-
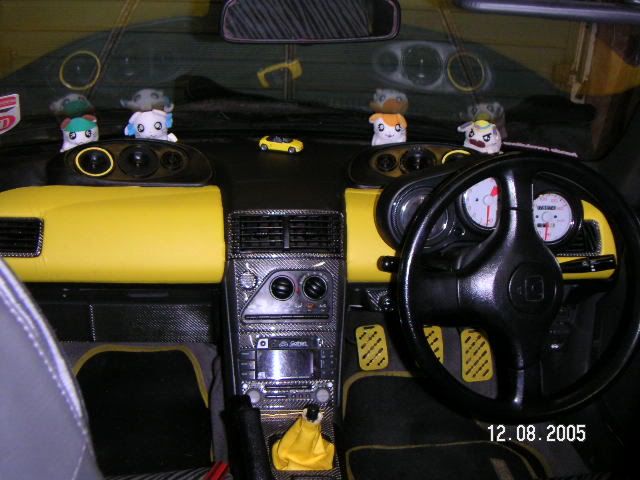
My new interior
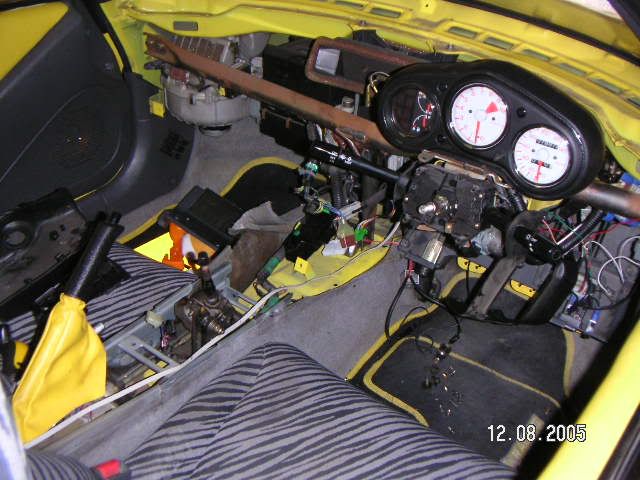
Step 1, go mad and rip out everything hee hee
Step 2, stay up until 2 in the morning 'cause you don't have a clock and didn't know what the time was, but hey it's worth it... i think hee hee
-
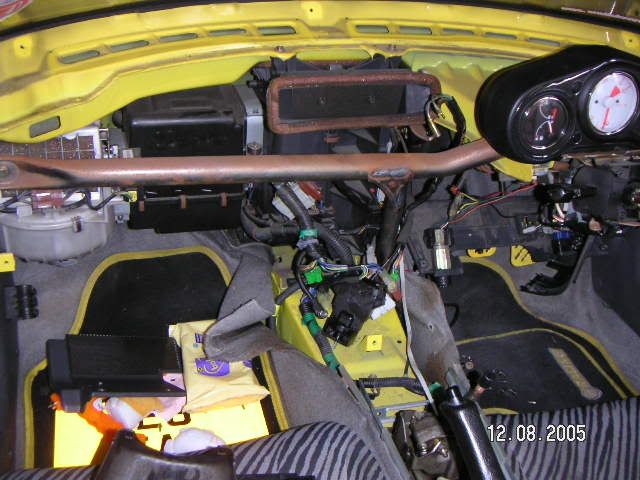
Step 3, keep an eye on your beat, make sure it doesn't try and eat your steering wheel
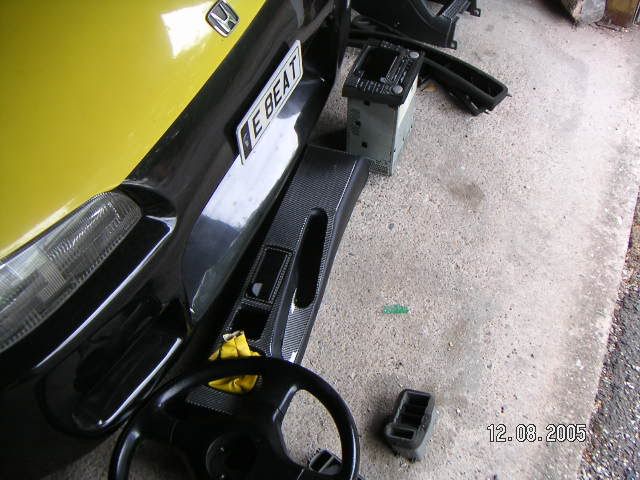
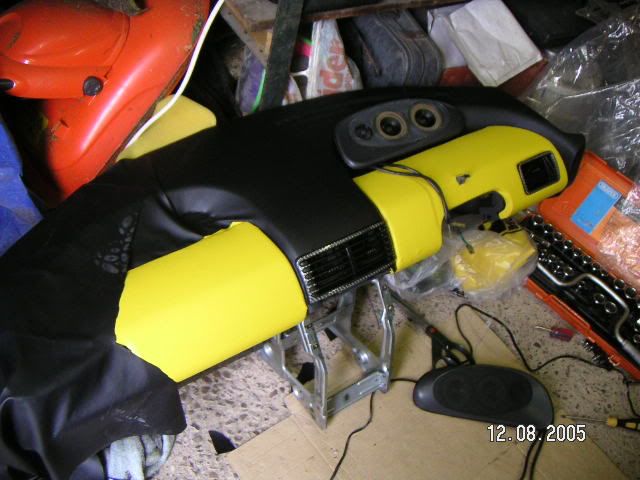
Step 4, remove the carbon stickers, cover the trims, then restick the stickers
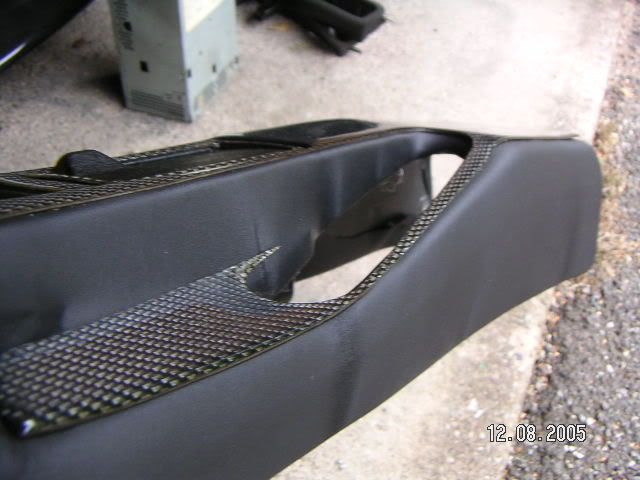
Step 5, always keep testing stuff still fits
-
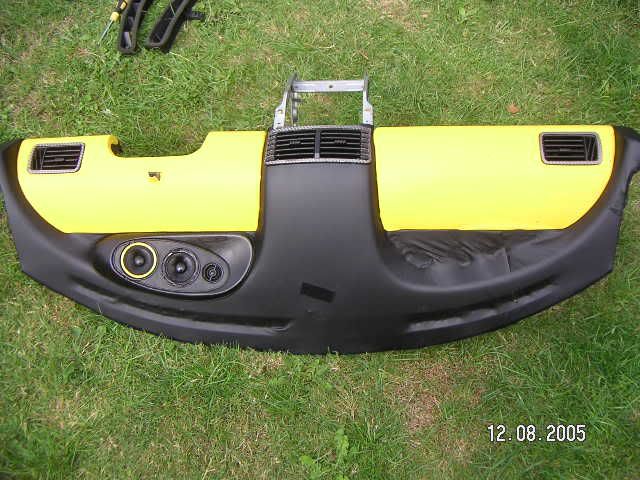
Step 6, have a break and admire your work, before you remember you still haven't made gaps for the vents hee hee
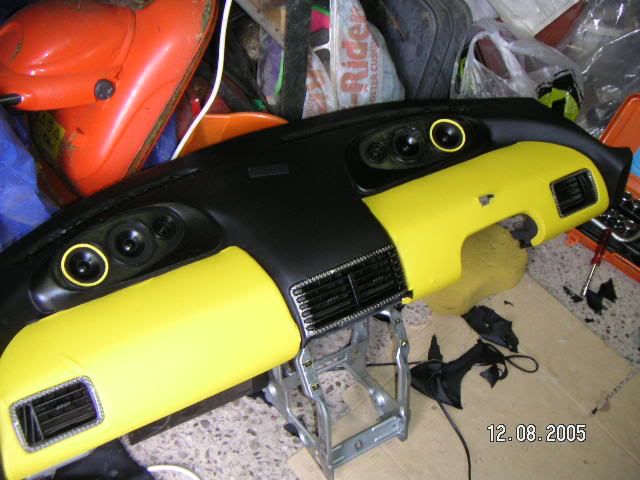
Step 7, fight like hell to get it back in without breaking something
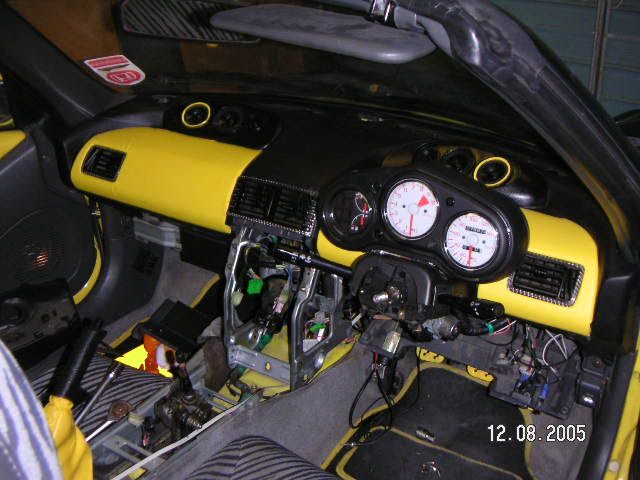
Step 8, return your car to a driveable condition
-
Step 9, replace HamHam toys
-
drastic or what.....
-
Hi looks good.
Are you sure you are a little girl ?????

-
-
Thanks 
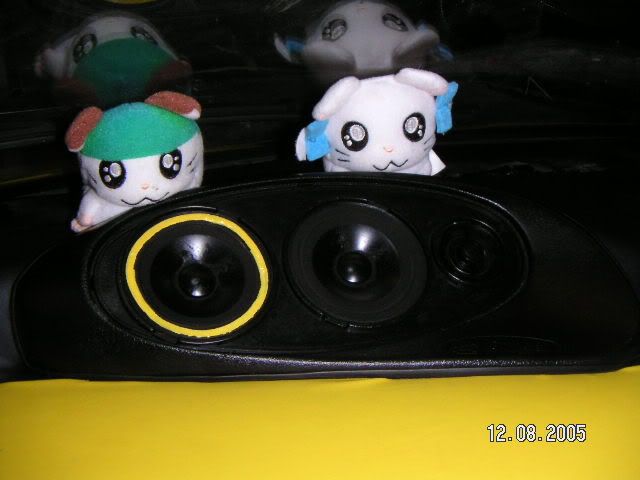
They are funny little critters, except that one on the far right. He's just scary, I have to put him there so i can't see him when i'm driving hee hee.
My grandad didn't like them watching him when he was passengering in the beat hee hee
-
Originally posted by Wh1teLeopard
Step 7, fight like hell to get it back in without breaking something
That's the stage where any job I tackle would go wrong for me 
Looks an excellent job, well done 
-
Great work once again. And all in a day too. I just saw the first photo, and thought, uh oh, she's bitten off too much to chew this time... But all looks good in the end.
Can you show a wider photo that combines the dash with the yellow door trims?
I like the black bumper - is it painted, or a replacement? If it's painted, I suggest you try painting the side air intake black next, assuming it is removable. Then maybe the door handle circle, but not the door handle... Black and yellow always looks mental. I love the Smart Roadster in those colours.
B
-
It's booked into the body shop on monday, to be fully resprayed
 Posting Permissions
- You may not post new threads
- You may not post replies
- You may not post attachments
- You may not edit your posts
-
Forum Rules


 Super Moderator


 Reply With Quote